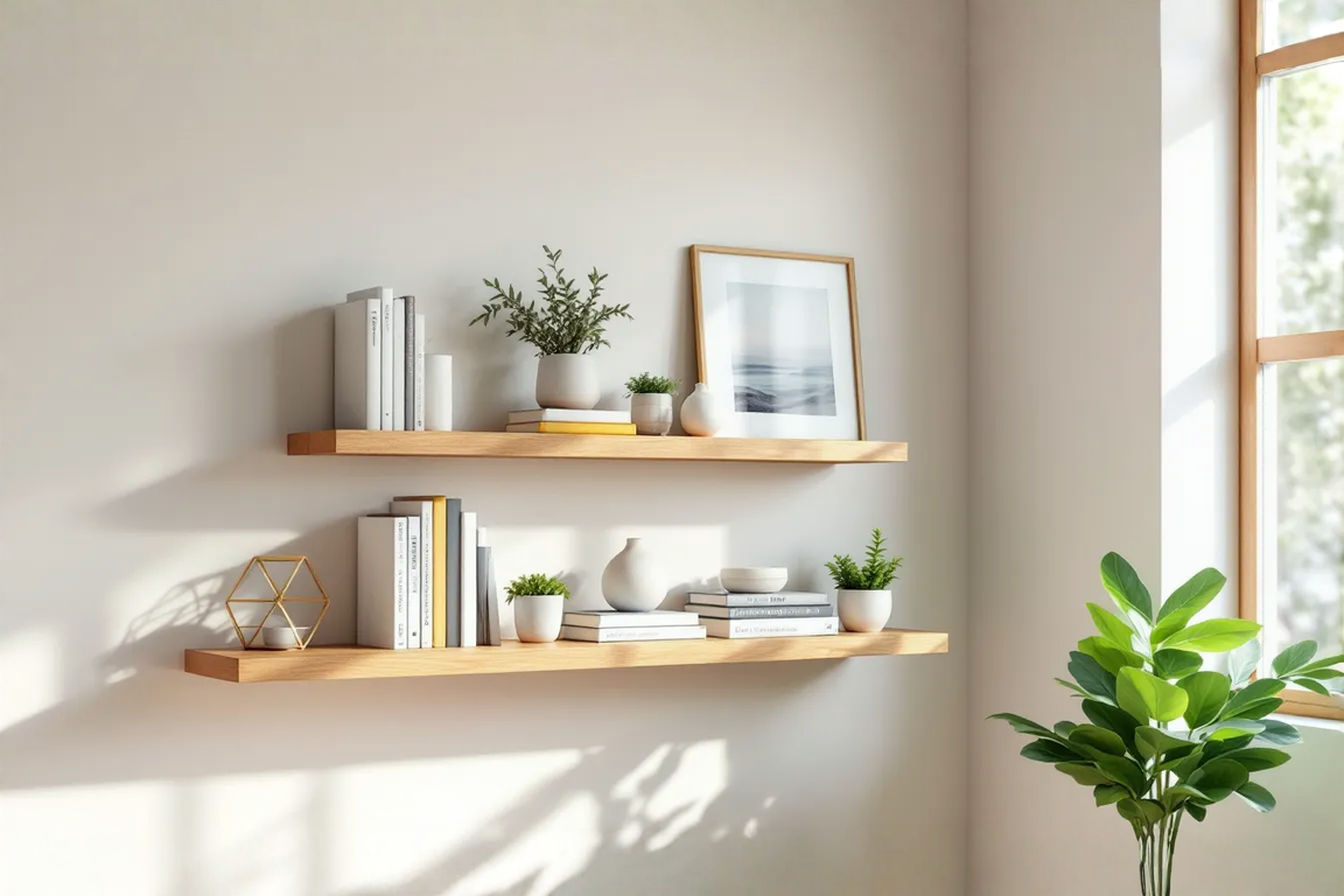
Style & Substance: Why Choose Deep Floating Shelves for Your Bedroom Walls
Want to add storage and style to your bedroom walls without bulky furniture? Deep floating shelves might be the perfect solution…
This post may contain affiliate links. If you make a purchase through these links, we may earn a commission at no additional cost to you.
Your bedroom should be a sanctuary, a place where you can relax and unwind. But often, it’s also a space that needs to work hard, especially when square footage is tight. Finding the right balance between creating a peaceful retreat and maximizing storage can be a challenge. That’s where deep floating shelves come into the picture. These aren’t your average narrow shelves; they offer substantial surface area without visible supports, blending seamlessly into your wall for a clean, modern look.
Choosing deep floating shelves for your bedroom walls is about adding both style and substance. They provide significant storage and display space, helping you keep your room tidy and personalize it with items you love. Unlike bulky bookcases or traditional shelving units that take up floor space, floating shelves utilize vertical space, making your room feel larger and less cluttered. This guide will walk you through everything you need to know about selecting, installing, and styling deep floating shelves to transform your bedroom.
The Compelling Case for Deep Floating Shelves in the Bedroom
Why should you consider deep floating shelves specifically for your bedroom? The reasons are numerous, focusing on their unique combination of practicality and aesthetic appeal. They solve common bedroom dilemmas like limited space and the need for both storage and personal expression.
Maximizing Usable Space
Bedrooms, regardless of size, often feel cramped quickly. Clothes, books, decor, and personal items can quickly pile up. Traditional furniture like dressers and nightstands help, but they consume valuable floor area. Deep floating shelves offer an alternative by using wall space that would otherwise go unused. Because they don’t have visible brackets underneath, they create a sense of openness, making the room feel airier and less confined.
Think about the area above your bed, a prime example of often-wasted vertical space. Installing deep floating shelves here provides a perfect spot for books, decorative objects, or even extra bedding, freeing up space elsewhere. Similarly, a deep floating shelf can replace a bedside table, offering surface area for a lamp, alarm clock, and a glass of water without cluttering the floor next to your bed. This is particularly useful in smaller bedrooms where every inch counts.
Combining Storage and Style
Deep floating shelves aren’t just about stashing things away; they’re also powerful design elements. Their clean lines and minimalist appearance complement a variety of bedroom styles, from modern and contemporary to rustic and bohemian. The “floating” effect itself adds a touch of sophistication.
The depth of these shelves is key. Standard shelves might only be deep enough for a row of paperbacks or small trinkets. Deep shelves, typically 10 inches or more, can accommodate larger items like stacks of magazines, decorative boxes, substantial plants, or even small storage baskets. This increased capacity means you can store more and display a wider variety of items, allowing your personality to shine through in your decor. You can curate collections, create visually interesting vignettes, and keep frequently used items within easy reach, all while enhancing the room’s overall aesthetic.
Versatility in Function and Placement
The beauty of deep floating shelves lies in their adaptability. They aren’t limited to just holding books. In a bedroom, they can serve multiple functions depending on their placement and how you style them.
Consider using a deep floating shelf as a compact desk area. Mounted at desk height with a stool tucked underneath, it provides a functional workspace without needing a full-sized desk that takes up significant floor space. A series of deep shelves can create a unique headboard with built-in storage and display. In a child’s bedroom, deep shelves can hold toys, books, and art supplies, keeping them organized and off the floor. Their versatility means you can tailor their use precisely to your bedroom’s needs and layout.
Choosing the Right Deep Floating Shelves
Selecting the perfect deep floating shelves involves more than just picking a color you like. You need to consider the shelf’s depth, the material it’s made from, and the overall style to ensure it meets your functional needs and complements your bedroom decor.
How Deep is “Deep”? Understanding Depth Considerations
While there’s no single official standard for “deep” floating shelves, they generally range from 10 inches to 12 inches or even deeper. This is significantly more substantial than standard decorative shelves, which might only be 4 to 8 inches deep. The ideal depth for your bedroom shelves depends entirely on what you plan to put on them.
For example, if you primarily want to store standard-sized books, a depth of 10 to 11 inches is usually sufficient, as most books are less than 9 inches deep. If you plan to store larger items like photo albums, decorative boxes, or even use the shelf for small electronics, you might need 12 inches or more. Kitchen shelves, for instance, are often 12 inches deep to accommodate dinner plates. While you might be tempted to go as deep as possible for maximum storage, remember that excessively deep shelves can sometimes feel visually heavy or protrude too far into the room, especially in narrow spaces. It’s a balance between storage needs and maintaining good flow in your bedroom. Measure the items you intend to store to determine the minimum depth required, then consider if slightly deeper would offer more flexibility without overwhelming the space.
Material Matters: Durability, Style, and Weight Capacity
The material of your deep floating shelf impacts its appearance, durability, and crucially, its weight capacity. Different materials offer different strengths and aesthetic qualities.
Solid Wood: A popular choice for its natural beauty, warmth, and strength. Hardwoods like oak, maple, walnut, and cherry are durable and can support significant weight, even at thinner profiles (1-2 inches thick). Softer woods like pine are more affordable but might be more susceptible to dents and scratches. Solid wood shelves can be stained or painted to match any decor. They are generally robust and long-lasting.
MDF (Medium-Density Fiberboard): An engineered wood product made from wood fibers, resin, and wax, pressed under high pressure. MDF is more cost-effective than solid wood and offers a smooth surface that takes paint exceptionally well. However, it’s less strong than solid wood and typically requires a thicker profile (at least 2 inches) to achieve good structural integrity and weight capacity, especially for deeper shelves. MDF is also susceptible to moisture damage, so it’s best used in areas without high humidity.
Plywood: Another engineered wood product, made from thin layers (veneers) of wood glued together with alternating grain directions for strength. High-quality plywood can be very strong and stable. It’s often used to construct hollow-core floating shelves, where a plywood box is built and then faced with veneer or solid wood. Plywood is less prone to warping than solid wood.
Metal: Offers a sleek, modern, or industrial look. Metal shelves are known for their strength and can often support heavy loads with thinner profiles compared to wood or MDF. Steel and aluminum are common choices. Metal shelves can be powder-coated in various colors for durability and style.
Other Materials: While less common for deep floating shelves intended for significant storage, you might find options in glass (usually requiring visible brackets or specialized support systems), acrylic, or even concrete composites. These are often better suited for lighter loads or purely decorative purposes.
When choosing a material, consider the weight of the items you plan to store, the desired aesthetic, and your budget. Solid wood and metal generally offer the highest strength and durability for deep shelves, while MDF and plywood can be more budget-friendly options, though they may have lower weight capacities or require thicker construction.
Style and Finish: Complementing Your Bedroom Decor
Beyond material, the style and finish of your deep floating shelves play a big role in your bedroom’s overall look. Do you want a rustic, reclaimed wood look, a sleek, minimalist painted finish, or something in between?
Edge Profile: The shape of the front edge of the shelf can significantly alter its appearance. A simple square edge offers a clean, modern look. A beveled or rounded edge can soften the appearance. A live edge, which follows the natural shape of the tree, adds a rustic or organic feel.
Finish: Paint, stain, or a clear sealant protects the shelf and dictates its color and sheen. A painted finish allows you to match or contrast with your wall color. Stains highlight the natural beauty of wood grain. A clear coat protects the material while maintaining its natural look. Consider the existing furniture and color palette in your bedroom when choosing the finish.
Overall Design: Some deep floating shelves incorporate subtle design details, like a slight lip along the front to prevent items from sliding off, or integrated LED lighting for added ambiance. Think about how these details align with your functional needs and desired style.
Weight Capacity: How Much Can Your Deep Shelves Really Hold?
One of the most critical considerations when choosing deep floating shelves, especially for a bedroom where you might store heavier items like books, is their weight capacity. The term “floating” can be misleading; these shelves rely on robust internal support systems and proper installation to bear weight. Understanding the factors that influence weight capacity is essential for safety and preventing sagging or failure.
Factors Influencing Weight Capacity
Several key factors determine how much weight a deep floating shelf can safely hold:
Shelf Material and Construction: As discussed earlier, the material makes a big difference. Solid hardwoods are inherently stronger than MDF. The thickness of the shelf also plays a role; a thicker shelf of the same material is generally stronger. For hollow-core shelves, the internal construction (e.g., the strength and spacing of the internal supports) is critical.
Bracket Type and Quality: The hidden brackets or support rods that attach the shelf to the wall are paramount. High-quality, heavy-duty steel brackets designed specifically for floating shelves can support significantly more weight than lighter-duty options. The design of the bracket—whether it uses solid rods, a cleat system, or a combination—impacts its load-bearing capability.
Number and Spacing of Brackets/Supports: A longer shelf will require more support points to distribute the load evenly and prevent sagging. The closer the brackets are spaced, the more weight the shelf can typically hold.
Wall Type and Anchoring: This is arguably the most critical factor. The strongest shelf and bracket system is useless if it’s not securely anchored to the wall structure.
- Wood Studs: Anchoring directly into solid wood studs behind drywall provides the most secure and strongest fixing point. Each screw driven into the center of a stud can typically support a significant amount of weight (often cited around 45-50 pounds per screw, though this can vary). A shelf spanning multiple studs will have a much higher weight capacity than one that doesn’t.
- Masonry (Brick, Concrete): Masonry walls offer excellent anchoring points, often providing even greater strength than wood studs when using appropriate masonry anchors or lag bolts.
- Drywall (without Studs): Relying solely on drywall anchors (like toggle anchors or expansion anchors) is the least secure method for heavy loads. While some heavy-duty drywall anchors exist, they have significantly lower weight capacities compared to fixing into studs or masonry. Deep floating shelves with substantial loads must be anchored into wall studs or masonry.
Load Distribution: How you place items on the shelf matters. Concentrating heavy items in the center of a long shelf between support points will cause more stress and potential sagging than distributing the weight evenly across the shelf, with heavier items placed directly over the support brackets.
Estimating Weight Capacity
Manufacturers often provide a maximum weight capacity for their floating shelves, but this rating is usually based on ideal installation conditions (e.g., anchored into studs at recommended spacing). It’s crucial to understand that the actual weight capacity in your home will depend on your specific wall type, the quality of your installation, and the load distribution.
A general rule of thumb for shelves anchored into wood studs is around 45-50 pounds per stud the bracket is attached to. So, a 4-foot shelf hitting three studs might theoretically support 135-150 pounds, assuming a quality bracket and proper installation. However, this is an estimate, and it’s always best to err on the side of caution.
For deep shelves, the increased leverage (the distance from the wall to the front edge) means the bracket and wall connection are under more stress. A deeper shelf, even with the same bracket and installation, might hold slightly less weight than a shallower shelf of the same length and material. This is a principle of physics: a longer lever requires less force to move. In this case, the shelf acts as a lever, and the weight on the shelf is the force trying to pull the bracket out of the wall.
Always check the manufacturer’s specifications and installation instructions carefully. If you’re unsure about your wall type or how to achieve a secure installation, consider consulting a professional. It’s better to be safe than risk your shelves failing and potentially causing damage or injury.
Types of Brackets for Deep Floating Shelves
Achieving the seamless, floating look requires specialized brackets that are hidden within the shelf itself. For deep shelves, which carry more leverage and potentially heavier loads, the type and quality of these hidden brackets are paramount.
Hidden Support Systems
The magic of floating shelves lies in their invisible support. Instead of traditional L-shaped brackets mounted underneath, floating shelves use brackets that are either embedded within the shelf material or attach directly to the wall and are then concealed by the hollow or routed-out shelf.
Solid Rod Brackets: These are common for solid wood floating shelves. Steel rods are securely mounted to the wall (ideally into studs or masonry). The back of the solid wood shelf is then drilled with corresponding holes that slide precisely onto the rods. The shelf is often secured to the rods with set screws or adhesive. The strength comes from the diameter and length of the rods, the quality of the wall anchoring, and how snugly the shelf fits onto the rods. For deeper shelves, thicker and longer rods, spaced appropriately, are necessary to prevent the shelf from tilting or sagging forward due to the increased leverage.
Cleat Systems: A cleat system involves two interlocking pieces, typically wood or metal. One piece is attached securely to the wall, and the other is attached to the back of the shelf. The shelf then hangs on the wall cleat. This system distributes the weight along the length of the cleat. While effective, cleat systems can sometimes result in a small gap between the shelf and the wall, which some users find less appealing than the flush look of solid rod systems.
Heavy-Duty Internal Brackets: Some deep or heavy-duty floating shelves use specialized internal metal brackets that mount to the wall and then slide into a pre-routed channel or hollow core within the shelf. These brackets are often engineered with specific load capacities in mind and may feature multiple attachment points to the wall.
Choosing Brackets for Heavy Loads
When you plan to store heavy items on your deep floating shelves, selecting brackets designed for significant loads is non-negotiable. Look for brackets explicitly labeled as “heavy-duty” or those with published weight capacities that meet or exceed your needs.
Steel Rod Diameter: For solid rod systems, a larger diameter steel rod (e.g., 1/2 inch or 5/8 inch) will be stronger and resist bending better than thinner rods (e.g., 3/8 inch).
Bracket Material and Thickness: Heavy-duty brackets are typically made from thick, strong steel. The gauge (thickness) of the steel used in the bracket is a good indicator of its strength.
Attachment Points: Brackets with multiple pre-drilled holes allow for more screws to be driven into studs or anchors, distributing the load over more fixing points and increasing overall capacity. Some heavy-duty brackets are designed to span across multiple stud bays for maximum support.
Engineered Systems: For very deep or heavily loaded shelves, consider engineered floating shelf systems that come with proprietary heavy-duty brackets designed specifically for that shelf’s size, material, and intended load. These systems often provide detailed installation instructions and weight ratings based on rigorous testing.
Remember, even the best heavy-duty bracket won’t perform optimally if it’s not installed correctly into a suitable wall structure. Always prioritize proper installation into studs or masonry for deep floating shelves carrying significant weight.
Installation Guide: Securing Your Deep Floating Shelves
Proper installation is paramount for the safety and stability of any floating shelf, but it’s especially critical for deep shelves due to the increased leverage. A poorly installed deep shelf can sag, become unstable, or even pull away from the wall, potentially causing damage or injury. While the specific steps may vary slightly depending on the shelf and bracket system you choose, the fundamental principles remain the same: locate secure anchoring points and ensure everything is level and firmly attached.
Tools and Materials You’ll Need
Before you begin, gather the necessary tools and materials:
- Your deep floating shelf(es) and accompanying brackets/hardware
- Stud finder (electronic is recommended for accuracy)
- Level (a longer level is helpful for longer shelves)
- Drill and drill bits (appropriate sizes for pilot holes and screws)
- Screwdriver or drill bits for driving screws
- Pencil
- Measuring tape
- Safety glasses
- Appropriate screws and anchors for your wall type (often included with the shelf, but verify they are suitable for your wall and intended load)
- Optional: Painter’s tape (to mark shelf position), wood shims (for leveling), touch-up paint/spackle (for patching mistakes)
Finding and Marking Studs
This is the most crucial step for installing deep floating shelves on drywall. Wood studs provide the solid backing needed to support weight. Standard wood studs in residential walls are typically spaced 16 inches or 24 inches apart, center to center.
- Use a Stud Finder: Turn on your electronic stud finder and move it slowly across the wall horizontally in the area where you plan to install the shelf. Mark the edges of the studs lightly with a pencil. Scan the area above and below your intended shelf line to confirm the vertical path of the stud.
- Confirm Stud Location: Once you’ve marked the edges, find the center of the stud. Some stud finders indicate the center. If not, find the midpoint between the two edge marks. You can often confirm the center by carefully drilling a small, shallow pilot hole; if you hit solid wood, you’re in the stud. If you hit empty space, adjust slightly.
- Mark Bracket Positions: Hold your floating shelf bracket up to the wall at the desired height and use a level to ensure it’s perfectly horizontal. Mark the locations of the bracket’s screw holes that align with the centers of the studs you found. Ideally, your bracket should span and allow you to screw into at least two studs for a standard shelf, and more for longer or very deep shelves. If the bracket holes don’t align perfectly with studs, you may need to drill new holes in the bracket itself to hit the studs, or use a different bracket system. Never rely solely on drywall anchors for deep floating shelves intended to hold significant weight.
Step-by-Step Installation (Drywall into Wood Studs)
This is the most common installation scenario.
- Mark Shelf Position: Use a level and pencil to draw a light horizontal line on the wall where the top or bottom of your shelf will sit. This helps with initial positioning. You can also use painter’s tape to mark the outline of the shelf.
- Mark Bracket Positions: As described above, hold the bracket level on the wall, aligning screw holes with stud centers, and mark the screw locations.
- Drill Pilot Holes: Drill pilot holes at the marked screw locations in the studs. The size of the pilot hole should be slightly smaller than the diameter of your screws to allow the screw threads to grip the wood firmly.
- Mount the Bracket: Position the bracket on the wall, aligning the holes with the pilot holes. Drive the appropriate screws (typically heavy-duty wood screws or lag bolts for substantial loads) through the bracket and into the studs. Tighten the screws securely, but be careful not to overtighten and strip the screw head or damage the drywall. Use a level to double-check that the bracket is perfectly horizontal after mounting.
- Install Drywall Anchors (Optional but Recommended for Extra Stability): If your bracket has additional screw holes that do not align with studs, use appropriate heavy-duty drywall anchors in these locations for added stability. Follow the anchor manufacturer’s instructions for installation. These anchors help prevent the shelf from tilting or wobbling, but they do not provide significant load-bearing capacity compared to stud fixings.
- Slide on the Shelf: Carefully slide the floating shelf onto the mounted bracket or rods. Ensure it fits snugly and is flush against the wall.
- Secure the Shelf to the Bracket: Depending on the shelf system, you may need to secure the shelf to the bracket using set screws (often located on the underside of the shelf, screwing into the rods) or adhesive. This step is crucial for preventing the shelf from accidentally being pulled off the bracket.
- Final Level Check: Use your level one last time to confirm the shelf is perfectly horizontal. If it’s slightly off, you might be able to use thin wood shims between the back of the shelf and the wall near the bracket to adjust the angle before permanently securing the shelf.
Installation on Masonry Walls (Brick, Concrete)
Installing on masonry requires different hardware but can provide a very strong fixing.
- Mark Positions: Mark the shelf and bracket positions as you would for drywall.
- Drill Holes: Use a hammer drill and a masonry drill bit to drill holes at the marked locations. The size of the drill bit and the depth of the hole will depend on the type and size of masonry anchors or lag bolts you are using.
- Insert Anchors: Insert the appropriate masonry anchors into the drilled holes, tapping them gently with a hammer until they are flush with the wall surface.
- Mount the Bracket: Position the bracket over the anchors and drive the screws or lag bolts through the bracket and into the anchors. Tighten securely.
- Slide on and Secure Shelf: Slide the shelf onto the bracket and secure it as per the manufacturer’s instructions.
- Final Level Check: Verify the shelf is level.
Ensuring a Level Installation
A level shelf not only looks better but also ensures that the weight is distributed correctly across the support system. Use a good quality level throughout the process, especially when marking bracket positions and after the shelf is fully installed. Small adjustments during bracket mounting can make a big difference in the final result.
Proper installation takes time and attention to detail, but it’s essential for the longevity and safety of your deep floating shelves. If you’re not comfortable with DIY or dealing with your specific wall type, hiring a professional installer is a wise investment.
Styling Your Deep Floating Shelves: Balancing Beauty and Function
Once your deep floating shelves are securely installed, the fun part begins: styling them! Deep shelves offer ample space for creativity, allowing you to display cherished items, organize essentials, and add personality to your bedroom. The key is to strike a balance between aesthetic appeal and practical functionality.
What to Display: Curating Your Collection
The depth of these shelves means you’re not limited to just small, flat objects. You can incorporate a variety of items to create visual interest and make the shelves truly useful in a bedroom context.
Books: Deep shelves are perfect for housing your literary collection. You can arrange books vertically, stack them horizontally, or combine both methods for a dynamic look. The depth allows for larger format books or even double-stacking smaller paperbacks.
Decorative Objects: Vases, sculptures, figurines, and other decorative pieces add visual flair. Vary the heights, shapes, and textures of your objects to create interest.
Plants: Indoor plants bring life and color to a space. Deep shelves can accommodate larger pots and allow plants to trail or grow upwards. Choose plants suitable for your bedroom’s light conditions.
Personal Items: Photographs, mementos, travel souvenirs, and framed art make the space uniquely yours. Mix different sizes and orientations of frames for a gallery-like feel.
Storage Baskets and Boxes: Utilize stylish baskets or decorative boxes to corral smaller items like remote controls, charging cables, jewelry, or bedtime essentials. This keeps clutter hidden while adding texture and style.
Lighting: A small lamp or LED strip lighting can add ambiance and highlight the items on your shelves.
Arrangement Tips for Visual Appeal
Arranging items on your deep shelves is an art form. Here are some tips to create a balanced and visually appealing display:
Vary Heights and Sizes: Avoid lining up items of the same height in a straight row. Mix tall and short objects, large and small pieces to create visual rhythm.
Group in Odd Numbers: Items often look more aesthetically pleasing when grouped in odd numbers (threes, fives, etc.).
Layer Items: Use the depth of the shelf to your advantage by layering objects. Place taller items at the back and shorter items or frames in front.
Create Vignettes: Tell a story or create a themed display with a collection of related items. For example, a travel-themed vignette might include souvenirs, photographs, and a small globe.
Leave Some Empty Space: Don’t feel the need to fill every inch of the shelf. Leaving some negative space allows the displayed items to breathe and prevents the shelf from looking cluttered.
Consider Color and Texture: Think about the color palette of your room and how the items on the shelves fit in. Mix different textures (smooth ceramics, rough wood, soft textiles) for added interest.
Balance the Composition: Distribute the visual weight evenly across the shelf. Avoid putting all the large or heavy-looking items on one side.
Balancing Style and Function
While aesthetics are important, remember that these are deep shelves chosen for their substance – their ability to store things. Ensure your styling choices don’t completely sacrifice functionality. If you need the shelves for storing books, make sure there’s still easy access to them, even with decorative items present. Use storage boxes for items you want to keep handy but out of sight. The goal is a beautiful space that also serves your practical needs.
Avoiding Clutter
Deep shelves offer more space, but they can also become a magnet for clutter if you’re not mindful. Regularly review the items on your shelves and remove anything that doesn’t belong or no longer serves a purpose. Grouping similar items and using storage containers helps maintain order. A well-styled shelf feels curated, not just piled high with stuff.
Deep Floating Shelves in Different Bedroom Areas
The placement of deep floating shelves in your bedroom can significantly impact their function and the overall feel of the room. Consider these popular and effective locations:
Above the Bed
This is a classic spot for floating shelves and deep shelves work particularly well here. They utilize the often-empty space above the headboard, providing storage and a focal point. You can use them for displaying art, photographs, books, or decorative items. Ensure they are installed securely at a height that prevents you from bumping your head.
Beside the Bed (as Nightstands)
In small bedrooms, a deep floating shelf mounted at the appropriate height can serve as a minimalist nightstand. It provides enough surface area for a lamp, alarm clock, phone, and a book, without taking up floor space like a traditional nightstand. Consider installing one on each side of the bed for symmetry and balanced functionality.
In Corners
Corner floating shelves, especially deep ones, are excellent for utilizing awkward corner spaces that might otherwise go to waste. They can provide valuable storage or display area in a less prominent but still accessible location.
Creating a Desk Area
As mentioned earlier, a deep floating shelf mounted at desk height can function as a simple, space-saving desk. Pair it with a comfortable stool or chair that can be tucked away when not in use. Add another shelf or two above for storage of office supplies or books.
Utilizing Awkward Spaces
Look for other underutilized areas in your bedroom, such as a narrow wall section, the space above a dresser, or even inside a closet for extra storage. Deep floating shelves can be custom-sized to fit these specific locations, turning dead space into functional storage and display areas.
Maintenance and Care
Keeping your deep floating shelves looking their best and ensuring their longevity requires simple, regular maintenance. The care required will depend primarily on the material of your shelves.
Cleaning Different Materials
Solid Wood: Dust regularly with a soft cloth. For deeper cleaning, use a slightly damp cloth and mild wood cleaner, following the grain of the wood. Avoid excessive moisture, which can damage wood. If the wood is sealed or finished, follow the care instructions for that specific finish.
MDF/Painted: Dust with a soft cloth. For marks or spills, wipe gently with a damp cloth and mild soap if necessary. Avoid abrasive cleaners or excessive water, as MDF can swell and be damaged by moisture, especially if the paint finish is chipped or compromised.
Metal: Dust with a soft cloth. For fingerprints or smudges, wipe with a damp cloth and mild cleaner. Avoid abrasive materials that could scratch the finish.
Checking for Stability
Periodically check your deep floating shelves for any signs of instability. Look for:
- Sagging: If the shelf is dipping in the middle or at the front edge, it may be overloaded or the brackets may not be providing adequate support. Remove items and assess the situation.
- Wobbling: If the shelf feels loose or wobbly when you touch it, the wall anchors or screws may have come loose.
- Gaps: Check for any gaps forming between the shelf and the wall, or between the bracket and the wall.
If you notice any of these issues, remove the items from the shelf immediately. Re-tighten screws if possible, or consider reinforcing the installation with stronger anchors or brackets, ensuring you are fixing into studs or masonry. Do not continue to use a shelf that shows signs of instability, especially a deep one with potential for heavy loads.
Conclusion
Deep floating shelves offer a compelling combination of style and substance, making them an excellent choice for enhancing both the aesthetics and functionality of your bedroom. They provide valuable storage and display space without consuming precious floor area, contributing to a more organized and visually appealing environment.
By carefully considering the depth, material, and bracket type, and ensuring proper installation into a secure wall structure, you can confidently add these versatile shelves to your space. Whether you use them to curate a personal library, display cherished decor, or simply keep essentials within reach, deep floating shelves can transform your bedroom walls from blank canvases into dynamic, hardworking elements of your personal sanctuary. Embrace the opportunity to add both style and substance to your bedroom with the thoughtful addition of deep floating shelves.