Need More Display Space? Install a Big Wall Shelf in Under 30 Minutes
Want more display space fast? Discover the simple steps and essential tools to install a big wall shelf in under 30 minutes, transforming your wall instantly.
This post may contain affiliate links. If you make a purchase through these links, we may earn a commission at no additional cost to you.
Feeling cramped? Does it seem like your belongings are taking over every flat surface? You’re not alone. Many homes today could use a serious boost in storage and display options. Adding a shelf to a blank wall is a fantastic way to solve this problem, instantly creating space for books, photos, plants, or decorative items. But maybe you’ve put it off, thinking it’s a complicated or time-consuming project. What if you could tackle installing a substantial wall shelf quickly, perhaps even in under 30 minutes?
This guide will walk you through exactly how to do that. We’ll cover everything from picking the right shelf and finding the perfect spot to using the correct tools and fasteners for your wall type. You’ll learn the secrets to a fast, secure installation, turning that empty wall into functional, stylish storage in less time than it takes to watch an episode of your favorite show. Get ready to reclaim your space and add some flair to your walls!
Why a Big Wall Shelf? More Than Just Storage
Adding a large wall shelf offers numerous benefits beyond simply getting things off the floor or countertops. It’s a strategic way to enhance your living space. A well-placed shelf can transform a bare wall into a focal point, adding visual interest and personality to a room.
Think about the vertical space in your home. Often, walls are underutilized. A big shelf lets you take advantage of this area, freeing up valuable floor space. This is especially helpful in smaller rooms where every square foot counts. It helps you declutter effectively by giving items a designated home. Instead of piles or scattered objects, everything can be neatly arranged.
Beyond pure storage, shelves provide a platform for display. You can showcase cherished photos, art pieces, collectibles, or indoor plants. This personalizes your space and makes it feel more like home. A large shelf can also anchor a wall, especially if it’s a long or tall wall that feels empty. It breaks up the expanse and adds structure. Function meets style when you choose a shelf that complements your decor. Whether it’s sleek and modern, rustic wood, or industrial metal, the shelf itself becomes part of the room’s design.
Is 30 Minutes Realistic? Setting Smart Expectations
Okay, let’s talk about that “under 30 minutes” promise. Is it always possible? With the right preparation, tools, and a bit of know-how, absolutely. Many standard shelf installations, especially bracketed ones, can be completed well within this timeframe once you have everything ready.
However, it’s crucial to set realistic expectations. This isn’t a race where speed is the only goal. Getting the shelf securely attached is the most important thing. Rushing can lead to mistakes, damage to your wall, or a shelf that isn’t stable. The 30-minute goal is achievable when you are organized and follow efficient steps.
Factors that influence the time include:
- Your experience level: If you’ve hung things before, you’ll likely be faster.
- The wall type: Drilling into drywall is generally quicker than drilling into brick or concrete.
- Finding studs: If studs are perfectly located, it speeds things up. If you need to use anchors, it adds a few steps.
- The shelf and hardware design: Some shelf mounting systems are simpler and faster than others.
- Having the right tools ready: Searching for a tool wastes precious minutes.
This guide focuses on the most common and relatively fast installation methods suitable for larger shelves. While some complex floating shelf systems or installations on challenging walls might take a bit longer, the principles here will still make the process as efficient as possible. Think of the 30 minutes as a target for a straightforward installation with good preparation. Even if it takes a little longer, you’ll still get the job done quickly and correctly.
Choosing the Right Shelf and Location
Before you grab any tools, you need to decide on the shelf itself and where it will go. These choices significantly impact the installation process and the type of hardware you’ll need.
Types of Shelves: Bracketed vs. Floating
The two most common types of wall shelves are bracketed and floating. Understanding the difference is key.
Bracketed Shelves: These are the most traditional type. They consist of a shelf board (made of wood, MDF, laminate, etc.) that sits on top of or is supported by visible brackets. The brackets are attached directly to the wall, and the shelf board then attaches to the brackets.
- Pros: Generally easier and faster to install, often provide stronger support, especially when attached to studs. Brackets come in many styles, adding to the decor.
- Cons: The brackets are visible, which might not suit everyone’s aesthetic preference.
Floating Shelves: These shelves appear to float on the wall with no visible support. They use a hidden mounting system, typically a metal rod or plate that is attached to the wall, and the shelf itself (which is hollow or has channels) slides onto this hardware.
- Pros: Clean, minimalist look. Creates a seamless appearance.
- Cons: Installation can be trickier, requires precise drilling, and the weight capacity is often lower than bracketed shelves unless specifically designed for heavy loads and installed correctly into studs or heavy-duty anchors.
For a “big” wall shelf, especially one intended to hold substantial weight (like a row of books), bracketed shelves often offer more straightforward strength and a potentially faster installation if you’re aiming for that sub-30-minute goal. However, heavy-duty floating shelf hardware installed correctly can also be very strong.
Shelf Material and Weight
The material of the shelf board affects its weight and durability. Common materials include:
- Solid Wood: Very strong and durable, but also heavier. Requires robust support.
- MDF (Medium-Density Fiberboard): Lighter than solid wood, takes paint well, but can sag under heavy loads if not thick enough or properly supported. Sensitive to moisture.
- Particleboard/Laminate: Often the lightest and least expensive. Can be prone to damage and has the lowest strength. Best for lighter items.
- Metal/Glass: Weight varies. Glass shelves require specific hardware and are usually for lighter decorative items. Metal can be very strong but also heavy.
Consider what you plan to put on the shelf. A shelf holding a few small decorative items needs less support than one intended for a large collection of hardcover books or heavy electronics. Always check the shelf’s weight capacity specified by the manufacturer. This rating is crucial for choosing the right mounting hardware.
Choosing the Location: Function and Structure
Where you put the shelf matters for both looks and successful installation.
- Function: What will the shelf be used for? This dictates the best height and location. For display, eye level is good. For storage, higher up might work.
- Aesthetics: How does the shelf fit into the room’s design? Consider wall symmetry, existing furniture, and overall balance.
- Wall Structure (CRITICAL): This is the most important factor for a secure installation. You need to know what’s behind the wall surface where you plan to hang the shelf. Are there studs? What is the wall made of (drywall, plaster, brick, concrete)? Attaching directly to wall studs is the strongest method for hanging anything heavy. If studs aren’t in the desired location, you’ll need to use appropriate wall anchors.
Before finalizing the location, use a stud finder to see if studs align with where your shelf brackets or floating shelf hardware need to go. If they do, great! If not, you’ll need to plan for using heavy-duty anchors, which we’ll discuss in detail.
Gathering Your Arsenal: Essential Tools and Materials
Having all your tools and materials ready before you start is key to hitting that under-30-minute goal. A quick trip to the garage or basement mid-project eats up valuable time. Here’s what you’ll need:
Essential Tools
- Drill: A cordless drill is ideal for convenience, but a corded drill works just as well. For masonry walls (brick, concrete), you’ll need a hammer drill, which adds a pounding action to help bore through tough material. Ensure your drill has a clutch setting to avoid over-tightening screws.
- Drill Bits: You’ll need bits appropriate for your wall material and the size of your fasteners.
- For wood studs or pilot holes in drywall: Standard twist bits.
- For masonry (brick, concrete, block): Masonry bits with a carbide tip.
- For installing wall anchors: The anchor packaging will specify the required drill bit size. It’s usually slightly larger than the anchor itself.
- Stud Finder: An electronic stud finder is the most common. It detects changes in wall density to locate studs. Magnetic stud finders locate the metal screws or nails used to attach the drywall or plaster lath to the studs. An electronic finder is generally faster for locating studs, but a magnetic one can help pinpoint the exact center by finding multiple fasteners along the stud’s line.
- Level: A spirit level is essential for ensuring your shelf is straight. A torpedo level (small) or a longer level (2-3 feet) works well. A laser level can project a perfectly straight line across the wall, which is very helpful for marking multiple bracket points or the line for a floating shelf bracket.
- Tape Measure: For measuring the shelf, marking distances between brackets, and determining the height on the wall.
- Pencil: For marking the wall where you’ll drill holes.
- Screwdriver: You’ll need a screwdriver bit (Phillips or flathead) that matches your screws. A power screwdriver attachment for your drill or an impact driver makes driving screws much faster than a manual screwdriver.
- Hammer: Needed to gently tap in some types of wall anchors or wall plugs.
- Safety Glasses: Always wear safety glasses when drilling to protect your eyes from dust and debris.
Necessary Materials
- The Shelf and Its Hardware: Ensure the shelf came with all the necessary mounting hardware (brackets, screws, floating shelf rods/plate).
- Wall Fasteners/Anchors: This is where you need to match the fastener to your wall type and the weight the shelf will hold. Do not use small plastic anchors for a big, heavy shelf, especially in drywall.
- For attaching to Wood Studs: Use strong wood screws (often included with shelf hardware). The screws should be long enough to go through the shelf bracket, through the drywall (typically 1/2 inch or 5/8 inch), and penetrate at least 1 to 1.5 inches into the solid wood stud for a secure hold.
- For Drywall (No Studs):
- Plastic Expansion Anchors: (Light duty, typically up to 10-20 lbs per anchor). These are basic anchors that expand when a screw is driven into them. Only suitable for very light shelves or small items on a shelf.
- Self-Drilling Drywall Anchors: (Medium duty, typically up to 25-50 lbs per anchor). These anchors have a sharp tip and coarse threads that allow them to be screwed directly into drywall without a pilot hole (though a small pilot might help). A screw is then driven into the anchor. Available in plastic and metal versions, with metal generally stronger.
- Molly Bolts (Hollow Wall Anchors): (Medium-heavy duty, typically up to 20-50 lbs per anchor depending on size and drywall thickness). These metal anchors have a sleeve that expands and collapses behind the drywall when the screw is tightened, creating a strong grip.
- Toggle Bolts: (Heavy duty, typically 50-100+ lbs per anchor depending on size and drywall thickness). These are among the strongest drywall anchors. They have a metal wing that folds closed to pass through a drilled hole and then springs open behind the drywall. A long bolt is then tightened, pulling the wing tight against the back of the wall. Newer versions like Snap Toggles are easier to install as the plastic channel holds the metal toggle in place while you insert the bolt.
- For Plaster Walls: Plaster can be tricky. Sometimes you can find the studs behind the lath and plaster. If not, you’ll need anchors designed for hollow walls (like molly bolts or toggle bolts) or specific plaster anchors. Drilling requires care to avoid cracking the plaster.
- For Masonry Walls (Brick, Concrete, Block):
- Plastic or Lag Shields with Lag Screws: Drill a hole, insert the plastic plug or metal shield, then drive a lag screw into it. The plug/shield expands, gripping the masonry.
- Sleeve Anchors: A bolt with an expandable sleeve. Drill a hole, insert the sleeve anchor, and tighten the nut/bolt. The sleeve expands against the side of the hole.
- Wedge Anchors: Very heavy-duty. A bolt with an expansion clip. Drill a hole, insert the wedge anchor, and tighten the nut. The bolt pulls the wedge clip up, expanding it against the sides of the hole.
- Tapcon Screws: These are special masonry screws that cut their own threads into a pre-drilled hole. They require a specific masonry drill bit. Useful for lighter loads on masonry but not typically for very heavy shelves.
Always check the weight rating on the fastener packaging. You need to use enough fasteners, each rated for sufficient weight, to support the total weight of the shelf plus the items you plan to put on it. For a big shelf, you’ll likely need several fasteners, and their combined capacity must exceed the expected load.
Understanding Your Wall: The Foundation of a Strong Shelf
Knowing what your wall is made of is fundamental to choosing the right installation method and fasteners. Using the wrong fastener for the wall type is the most common reason shelves fail.
Drywall
Drywall, also known as plasterboard or gypsum board, is the most common interior wall material in modern homes. It’s made of a gypsum plaster core pressed between two thick sheets of paper. It’s relatively soft and not very strong on its own. Attaching anything directly to the drywall sheet itself, without hitting a stud or using a proper anchor, will only hold very light items. The strength comes from the underlying structure (studs) or from anchors designed to grip the back of the board or expand within the hole. Standard drywall thickness is usually 1/2 inch or 5/8 inch. This thickness affects the grip of certain anchors.
Plaster Walls
Older homes often have plaster walls. These are typically constructed by applying layers of wet plaster over a framework of narrow wooden strips called lath. Once the plaster dries, it forms a hard, durable surface. Plaster walls can be stronger than drywall, but they can also be brittle and prone to cracking, especially when drilling. Locating studs behind plaster can be harder than with drywall. If you can’t find studs, you’ll need anchors designed for hollow walls (like toggle bolts) or specific plaster anchors that account for the lath layer. Drilling into plaster requires a sharp drill bit and often a slower speed to prevent cracking.
Masonry Walls
Masonry walls are constructed from hard materials like brick, concrete, or concrete blocks. These walls are very strong and can support heavy loads, but they require specialized drill bits (masonry bits) and fasteners (masonry anchors) to attach anything. A regular drill won’t get through concrete or brick; you’ll need a hammer drill. The installation process involves drilling into the solid material and then inserting an anchor that expands within the hole to create a secure fixing point.
Identifying your wall type is usually straightforward. Drywall feels relatively soft and might dent if you press hard. Plaster is much harder. Brick or concrete is obvious. If you’re unsure, you can often tell by looking inside an electrical outlet box (with the power off!) or by carefully drilling a small, inconspicuous test hole (start with a regular drill bit; if it stops quickly against something hard, switch to a masonry bit).
Finding the Strength: Locating Wall Studs
Attaching your big wall shelf directly to the structural framing of your wall – the studs – provides the most secure and strongest installation possible. This is the preferred method, especially for heavy shelves or those that will hold a lot of weight.
What are Studs?
Studs are the vertical pieces of lumber (usually 2×4 or 2×6) or metal that form the framework of your walls. In most modern homes in the U.S., they are spaced either 16 inches or 24 inches apart, measured from the center of one stud to the center of the next (called “on center”). They run from the floor to the ceiling. Drywall or plaster is attached to these studs.
Why Attach to Studs?
Attaching your shelf brackets or floating shelf hardware directly into the solid wood (or metal) of a stud provides a robust anchoring point that can support significant weight. Unlike drywall, which is relatively weak, the stud is part of the building’s structure. Screws driven correctly into a stud are far less likely to pull out than any type of drywall anchor, especially under heavy or dynamic loads (like someone bumping the shelf).
Using a Stud Finder
This is your best friend for quickly locating studs.
- Electronic Stud Finders: These are the most common. You place the device flat against the wall and move it horizontally. When it detects a change in density (like the edge of a stud), it will light up or beep. To find the center of the stud, scan across the area again; the device will usually indicate the center point. Some advanced models can detect depth, electrical wires, and pipes.
- Magnetic Stud Finders: These are simpler and cheaper. They use a strong magnet to find the metal screws or nails used to attach the drywall or lath to the studs. As you move it across the wall, the magnet will stick or react when it’s over a fastener. Finding a line of fasteners vertically indicates a stud. While they don’t find the wood directly, finding the fasteners attached to the wood achieves the same goal. They are less prone to false positives from metal in the wall like pipes or wires, but can be slower than electronic finders.
Tips for Using a Stud Finder:
- Start scanning a few inches to the left or right of where you expect a stud.
- Move the finder slowly and horizontally across the wall.
- Mark the edges of the stud when the finder indicates them, then find the center point.
- Scan vertically above and below your initial mark to confirm you’ve found a stud and not just a random piece of wood or blocking.
- Try scanning at the height of electrical outlets or light switches; these are often attached to studs.
Alternative Methods
If you don’t have a stud finder or are having trouble using it:
- Tapping: Tap lightly on the wall with your knuckle or a small hammer. The sound will change from a hollow sound (between studs) to a more solid sound when you are over a stud. This requires practice to identify the difference reliably.
- Measuring: In modern construction, studs are typically 16 or 24 inches on center. You can often find a stud next to a door or window frame (there’s usually one there) or near a corner. Measure 16 inches or 24 inches horizontally from that known stud location. Use a small drill bit to carefully drill a test hole at that point to confirm. If you don’t hit wood, measure and test at the next likely interval.
- Looking for Fasteners: Sometimes you can spot faint bumps or imperfections on the wall surface where screws or nails were used to attach the drywall. These often indicate a stud line.
What if Studs Aren’t Where You Need Them?
Ideally, your shelf brackets or floating shelf hardware mounting points will align perfectly with stud locations. But this isn’t always the case. If the desired position for your shelf doesn’t line up with studs, you have two main options:
- Adjust the Shelf Position: If possible, shift the shelf slightly horizontally so that at least two mounting points hit studs. For a long shelf, hitting two studs is usually sufficient if the shelf material itself is strong enough not to sag between them.
- Use Heavy-Duty Wall Anchors: If you absolutely must hang the shelf in a location without studs, you will need to rely on wall anchors. For a big shelf, this means using heavy-duty anchors specifically rated for the weight you expect to put on the shelf. We’ll cover these next.
No Studs? No Problem: Working with Wall Anchors
When wall studs aren’t available in your desired shelf location, wall anchors become essential. These devices are designed to provide a secure fastening point in hollow walls like drywall or plaster, or in solid masonry where screws alone won’t hold. For a big shelf, choosing the right heavy-duty anchor is critical for safety and stability.
When to Use Anchors
You use wall anchors when:
- Your desired shelf location does not have studs where you need them.
- You are installing a shelf on a masonry wall (brick, concrete, block) where screws cannot be driven directly.
- The shelf is relatively light, and hitting a stud isn’t strictly necessary (though still preferable for heavier items).
Detailed Explanation of Different Anchor Types and Their Load Capacities
Anchor types vary greatly in design, installation method, and the amount of weight they can safely support. Always check the manufacturer’s stated load capacity, which is usually listed on the packaging. Note that load capacities are often given for optimal conditions and can be reduced by factors like poor installation, weak wall material, or dynamic loads.
Here are the common types, moving from lighter to heavier duty for drywall:
Plastic Expansion Anchors (Light Duty)
- Description: These are simple plastic sleeves. You drill a pilot hole, tap the anchor into the hole until it’s flush with the wall, and then drive a screw into the anchor. As the screw enters, it expands the plastic sleeve, causing it to grip the sides of the hole.
- Load Capacity: Typically rated for 10-20 pounds per anchor in 1/2 inch drywall.
- Use Case: Suitable for very small, lightweight shelves holding only a few decorative items. Not recommended for a “big” shelf or anything holding significant weight.
- Installation: Drill pilot hole (size specified on packaging), tap anchor flush, insert screw and tighten until snug.
Self-Drilling Drywall Anchors (Medium Duty)
- Description: These anchors, made of plastic or metal, have a sharp, auger-like tip and coarse threads. They can be screwed directly into drywall using a Phillips head screwdriver or a drill (use low speed to avoid stripping). Once the anchor is seated flush, you drive a screw into the center of it.
- Load Capacity: Typically rated for 25-50 pounds per anchor in 1/2 inch or 5/8 inch drywall, with metal versions generally stronger than plastic.
- Use Case: Good for medium-weight shelves or items. Can be faster to install than other types as they often don’t require pre-drilling (though a small pilot hole can sometimes help).
- Installation: Position anchor, screw it directly into drywall until flush, insert screw and tighten.
Molly Bolts (Hollow Wall Anchors) (Medium-Heavy Duty)
- Description: These are metal anchors with a pointed or non-pointed end and a sleeve that is split lengthwise. You drill a pilot hole, insert the molly bolt, and then tighten the screw. As the screw is tightened, it pulls the back end of the sleeve towards the wall, causing the sleeve to expand and collapse behind the drywall, creating a strong grip. Some types have ‘barbs’ on the flange to prevent them from spinning in the hole.
- Load Capacity: Typically rated for 20-50 pounds per anchor depending on size and drywall thickness.
- Use Case: A reliable choice for medium to heavy loads on drywall or plaster.
- Installation: Drill pilot hole (size specified), insert molly bolt (tap flush if needed), tighten the screw (which causes the sleeve to expand) until resistance is felt, then remove the screw (the expanded sleeve stays in the wall), position your bracket over the hole, and re-insert the screw through the bracket into the expanded anchor.
Toggle Bolts (Heavy Duty)
- Description: These are among the strongest anchors for hollow walls. They consist of a metal wing attached to a bolt. You drill a relatively large hole (big enough for the folded wing to pass through), push the wing through the hole (it springs open on the other side), and then pull back on the bolt while tightening it. This pulls the metal wing flush against the back of the drywall or plaster.
- Load Capacity: Can hold 50-100+ pounds per anchor, depending on size and wall material thickness. The strength is often limited by the strength of the wall material itself rather than the anchor.
- Use Case: Essential for hanging heavy items like large shelves, TVs, or mirrors when studs aren’t available.
- Installation (Traditional Toggle): Drill large pilot hole, feed bolt through your shelf bracket, thread the toggle wing onto the bolt, pinch the wing closed, push the wing through the hole, ensure the wing springs open, pull back on the bolt to seat the wing against the wall, and tighten the bolt.
- Installation (Snap Toggle/Strap Toggle): These are easier. Drill a hole, insert the plastic strap with the metal toggle attached, pull the strap to seat the toggle against the back of the wall, snap off the excess plastic strap, leaving a plastic collar flush with the wall. Then insert the bolt through your bracket and into the threaded metal toggle. This method is faster and prevents the toggle from falling into the wall cavity if you remove the bolt.
Masonry Anchors (For Brick, Concrete, Block)
- Description: These anchors are designed to expand within a hole drilled into solid masonry, creating a secure grip. Types include plastic plugs (used with wood screws), lag shields (used with lag screws), sleeve anchors, and wedge anchors.
- Load Capacity: Varies greatly depending on the type, size, and quality of the masonry. Heavy-duty masonry anchors can support very substantial loads.
- Use Case: Required for any installation on brick, concrete, or concrete block walls.
- Installation: Requires a hammer drill and masonry bit. Drill a hole of the specified size and depth, clear out the dust, insert the anchor, and tighten the screw or bolt to activate the expansion mechanism.
Matching Anchor Capacity to Shelf and Load Weight
This is critical for a safe installation.
- Estimate Total Weight: Add the weight of the shelf itself to the estimated maximum weight of the items you plan to put on it. Be generous with your estimate.
- Check Anchor Capacity: Look at the load rating per anchor on the packaging.
- Calculate Required Anchors: Divide the total estimated weight by the capacity of a single anchor. This tells you the minimum number of anchors needed.
- Use Multiple Anchors: For a big shelf, you will use multiple anchors (typically 2-4 or more per bracket, depending on the bracket size and design, and the total number of brackets). Ensure the combined load capacity of all the anchors you use significantly exceeds the total estimated weight. For example, if your estimated total weight is 100 lbs and you are using anchors rated for 50 lbs each, you would need at least two anchors. If your shelf uses two brackets, you might use two anchors per bracket (total 4 anchors) for added security, providing a total capacity of 200 lbs.
When in doubt, use stronger anchors or more anchors than you think you need. It’s better to over-engineer the support than to have the shelf fail.
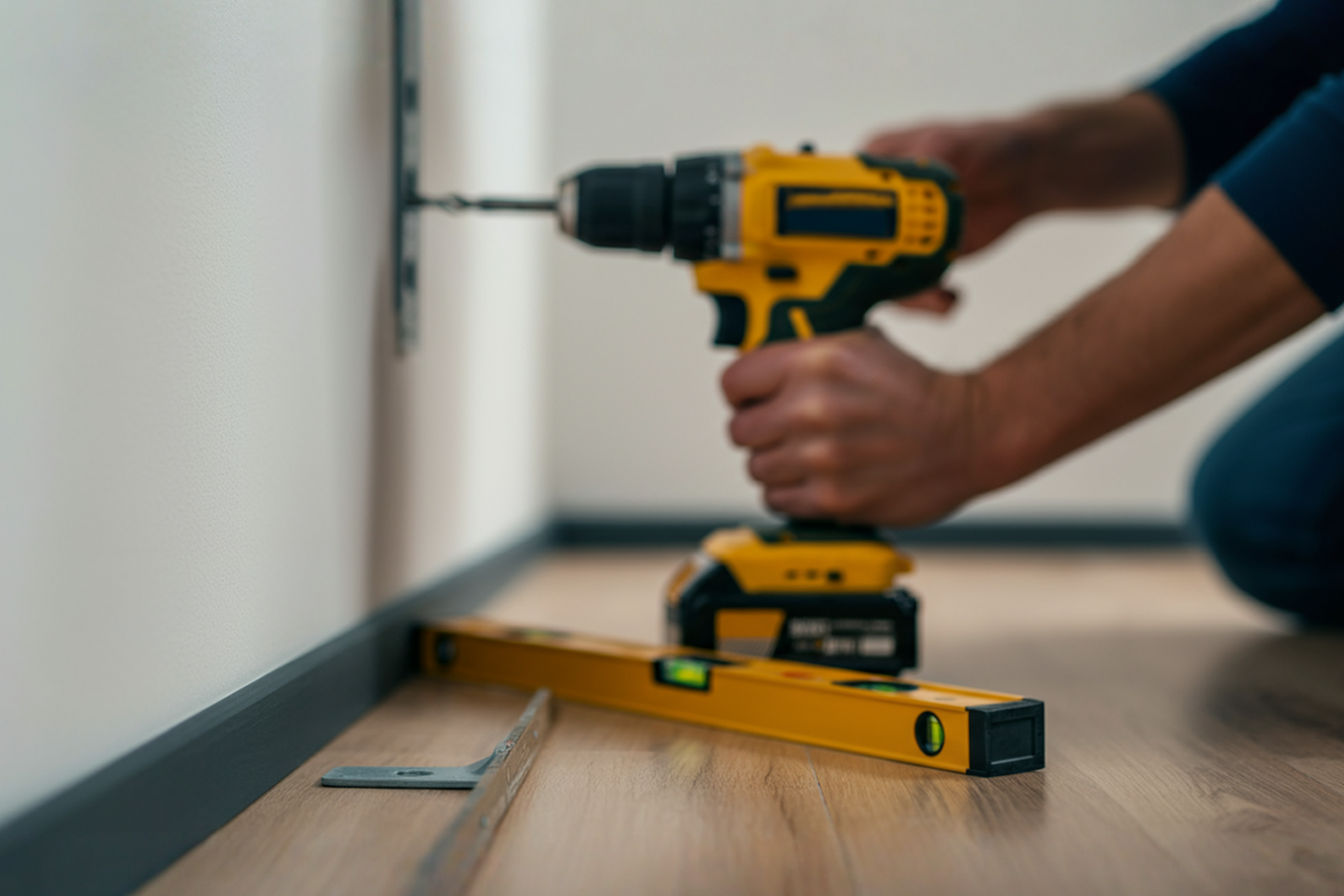
Step-by-Step Installation Guide: Bracketed Shelf
Installing a bracketed shelf is often the quickest method, making it a prime candidate for the under-30-minute goal. Here’s a detailed breakdown:
Step 1: Mark the Height and Level Line
Decide exactly where you want the bottom of your shelf to be. Use your tape measure to measure from the floor or ceiling and make a light pencil mark on the wall at the desired height.
Now, use your level (a long spirit level or a laser level is best for a big shelf) to draw a light, level horizontal line on the wall at that height. This line will be your guide for placing the brackets. Ensure this line is perfectly level – a crooked shelf is very noticeable!
Step 2: Position the First Bracket and Mark Holes
Hold the first shelf bracket against the wall. Align the top of the bracket with the level line you drew. Position the bracket horizontally where you want the edge of your shelf to start. Use your pencil to mark the wall through each of the screw holes on the bracket. These marks show you where you’ll need to drill.
Step 3: Position Subsequent Brackets and Mark Holes
If your shelf uses more than one bracket, measure the distance required between brackets according to the shelf or bracket manufacturer’s instructions. Mark the position for the next bracket along your level line, using the tape measure to ensure the correct spacing from the first bracket.
Hold the second bracket against the wall, aligning its top edge with the level line and its position mark. Mark the screw holes for this bracket. Repeat this process for any additional brackets, ensuring they are all aligned with the level line and correctly spaced. Double-check all your marks are perfectly aligned horizontally using your level.
Step 4: Check for Hazards Before Drilling
This is a critical safety step you must not skip. Before you drill into any of your marked spots, use your stud finder (most electronic ones have this feature) or a dedicated wire/pipe detector to scan the areas around your marks. You are checking for hidden electrical wires or water pipes inside the wall. Drilling into either of these can cause serious injury, electrical shock, fire, or significant water damage.
If your detector indicates a hazard at a marked drilling point, you must move that point. Shift the bracket position slightly horizontally or vertically until all screw hole locations are clear of detected hazards. It’s much better to adjust the shelf position slightly than to risk hitting something in the wall.
Step 5: Drill Pilot Holes
Now you’re ready to drill. The type and size of drill bit depend on what you’re drilling into:
- If drilling into a Wood Stud: Use a standard wood drill bit slightly smaller than the diameter of your screw. The screw packaging or shelf instructions might recommend a size. The pilot hole helps prevent the stud from splitting and makes driving the screw easier. Drill the hole deep enough for the screw length, minus the drywall thickness.
- If drilling into Drywall for Anchors: Use a drill bit size specified on the packaging of your wall anchors. This size is crucial for the anchor to work correctly. Drill the hole to the required depth for the anchor.
- If drilling into Masonry (Brick, Concrete): Use a masonry drill bit and a hammer drill. The anchor packaging will specify the drill bit size and the required depth of the hole. Drill straight into the wall, keeping the drill perpendicular to the surface.
Pro Tip: To control drilling depth, you can wrap a piece of masking tape around your drill bit at the point where you need to stop drilling.
Drill carefully and straight at each marked location. Wear your safety glasses!
Step 6: Install Anchors (If Needed)
If you are not drilling into studs, you need to install your chosen wall anchors into the pilot holes you just drilled. Follow the specific instructions for your type of anchor (plastic expansion, self-drilling, molly bolt, toggle bolt, masonry anchor).
- Plastic Expansion: Tap flush with a hammer.
- Self-Drilling: Screw directly into drywall until flush.
- Molly Bolt: Insert, then tighten the screw to expand the sleeve behind the wall. Remove the screw afterward.
- Toggle Bolt (Traditional): Insert the wing through the large hole, pull back on the bolt to seat the wing.
- Toggle Bolt (Snap Toggle): Insert the strap/toggle, pull the strap to seat, snap off the excess.
- Masonry Anchor: Insert into the drilled hole, tap flush, then drive the screw or tighten the bolt/nut to expand it.
Ensure the anchors are properly seated and feel secure in the wall before proceeding.
Step 7: Attach the Brackets to the Wall
Hold the first bracket against the wall, aligning its screw holes with the pilot holes (or installed anchors). Insert the screws. Use your drill with a screwdriver bit (or a power screwdriver/impact driver) to drive the screws.
If screwing into studs, tighten the screws firmly until the bracket is snug against the wall. Be careful not to overtighten, which can strip the screw head or the wood.
If screwing into anchors, tighten the screws until the bracket is snug and the anchor feels secure. Do not overtighten anchors, especially in drywall, as you can strip the anchor or damage the drywall, causing the anchor to lose its grip. Stop tightening as soon as you feel firm resistance.
Attach all the brackets to the wall using the same method.
Step 8: Place the Shelf on Brackets
Carefully place the shelf board on top of the installed brackets. Position it so that the overhang on each end is equal (unless the shelf is designed to go wall-to-wall).
Step 9: Secure the Shelf to the Brackets (If Applicable)
Many bracketed shelf systems include small screws that go up through holes in the brackets into the underside of the shelf board. This prevents the shelf from being accidentally knocked off the brackets.
If your system includes these screws, use a small drill bit to drill pilot holes up into the shelf board through the bracket holes (check the shelf’s thickness so you don’t drill all the way through!). Then, drive the small screws to secure the shelf to the brackets.
Step 10: Final Level Check
Step back and use your level one last time to check the top surface of the shelf board. It should be perfectly horizontal. If it’s slightly off, you might be able to make minor adjustments by slightly loosening and retightening bracket screws, but significant adjustments usually require repositioning a bracket.
Clean up any pencil marks and dust. Your bracketed shelf is installed!
Step-by-Step Installation Guide: Floating Shelf
Installing a floating shelf can sometimes take a little longer than a bracketed one due to the precision required for the hidden hardware. However, with the right tools and a good system, it’s still achievable quickly. The key is the mounting bracket, which is usually a metal plate or bar with rods that protrude outwards.
Step 1: Mark the Height and Level Line
Just like with a bracketed shelf, decide the desired height for your floating shelf. Mark this height on the wall with a light pencil mark. Use a level (a long spirit level or laser level is highly recommended for accuracy) to draw a perfectly level horizontal line on the wall at this height. This line represents where the top edge of your floating shelf’s hidden bracket will sit.
Step 2: Position the Hidden Bracket and Mark Holes
Hold the floating shelf’s hidden mounting bracket against the wall, aligning its top edge with your level line. Position it horizontally where you want the shelf to be. Use your pencil to mark the wall through each of the screw or bolt holes on the bracket. These marks are where you will drill to attach the bracket to the wall.
Step 3: Check for Hazards
Again, scan the marked drilling locations with a stud finder or wire/pipe detector. Ensure there are no hidden electrical wires or water pipes behind the wall at any of your marks. Adjust the bracket position slightly if necessary to avoid hazards.
Step 4: Drill Pilot Holes
Drill pilot holes at each marked location. The size and type of drill bit depend on what you’re drilling into:
- If drilling into a Wood Stud: Use a standard wood drill bit slightly smaller than your screw/bolt diameter. Drill deep enough to penetrate the stud securely (at least 1 to 1.5 inches into the stud beyond the drywall).
- If drilling into Drywall for Heavy-Duty Anchors: Use a drill bit size specified by your chosen heavy-duty anchor (molly bolt, toggle bolt, snap toggle). Remember, toggle bolts require a larger hole than other anchor types to pass the wing through. Drill to the depth required for the anchor.
- If drilling into Masonry: Use a masonry drill bit and a hammer drill. The anchor packaging will specify the size and depth.
Step 5: Install Appropriate Heavy-Duty Anchors or Drill into Studs
Based on your wall type and whether you are hitting studs:
- Into Studs: No anchor needed. You will drive screws or bolts directly into the wood studs in the next step.
- Into Drywall (No Studs): Install your chosen heavy-duty drywall anchors (molly bolts, toggle bolts, snap toggles) into the pilot holes. Follow the specific installation instructions for the anchor type. Ensure they are securely installed and rated for the weight.
- Into Masonry: Install your chosen masonry anchors (sleeve anchors, wedge anchors, etc.) into the pilot holes using your hammer drill.
Step 6: Attach the Hidden Bracket Securely
Hold the hidden mounting bracket against the wall, aligning its holes with your pilot holes (or installed anchors). Insert the screws or bolts that came with the floating shelf hardware (or came with your heavy-duty anchors).
Use your drill/driver to drive the screws or bolts. Tighten them securely.
- Into Studs: Tighten firmly until the bracket is pulled snug against the wall.
- Into Anchors: Tighten until the bracket is snug and the anchors feel secure. Be careful not to overtighten anchors in drywall or masonry, as this can damage the wall or the anchor’s grip.
The hidden bracket must be very firmly attached to the wall, as it will bear the entire weight of the shelf and its contents.
Step 7: Slide the Shelf Onto the Bracket Rods/Plate
Carefully take your floating shelf board. It will have pre-drilled holes or a channel designed to slide onto the rods or plate of the hidden bracket. Align the shelf with the bracket and slide it firmly onto the hardware until the back of the shelf is flush against the wall. You might need to wiggle it slightly to get it to seat fully.
Step 8: Secure the Shelf to the Bracket (Often with Set Screws)
Most floating shelf systems include small set screws, usually located on the underside of the shelf board near the back. These screws are driven into the hidden metal bracket once the shelf is in place. This prevents the shelf from sliding off the bracket accidentally.
Locate these set screws (you might need to look underneath the shelf). Use a small screwdriver (often an Allen key is provided) to tighten these set screws until they make firm contact with the metal bracket. Do not overtighten, but ensure they are snug enough to hold the shelf in place.
Step 9: Final Level Check
Place your level on top of the installed floating shelf. It should be perfectly level. If it’s not, the issue is likely with the installation of the hidden bracket. You might need to remove the shelf and bracket to make adjustments to the bracket’s position or ensure it was installed perfectly level in the first place.
Clean up any marks or dust. Your floating shelf is now installed!
Troubleshooting Common Issues
Even with careful planning, you might encounter small issues during installation. Here’s how to handle some common problems:
Shelf Isn’t Level
If your shelf is slightly off-level after installation:
- Bracketed Shelf: If the screws aren’t fully tightened, you might be able to slightly adjust a bracket’s angle by loosening and retightening. If the brackets are firmly attached but still not level, one or more brackets were likely installed slightly too high or low. You may need to remove the shelf and the offending bracket(s), patch the old holes, and re-install the bracket(s) correctly, paying extra attention to your level line.
- Floating Shelf: If the hidden bracket wasn’t installed perfectly level, the shelf won’t be level. You’ll need to remove the shelf, remove the hidden bracket, patch the old holes, and re-install the bracket ensuring it’s perfectly aligned with your level line.
Drilling into a Stud Unexpectedly
If you planned to use anchors but hit a stud when drilling a pilot hole, that’s actually good news! Attaching to a stud is stronger than using an anchor. You can abandon the anchor for that hole and simply drive a strong wood screw of the appropriate size and length directly into the stud through your bracket or mounting hardware. Make sure the screw head is compatible with your hardware.
Drilling into Something Else (Pipe, Wire)
STOP IMMEDIATELY. If you hit metal or feel strong resistance and suspect you’ve hit a pipe or electrical wire, do not continue drilling.
- Electrical Wire: If you hit a wire, you’ll likely see sparks, hear a loud pop, or trip a circuit breaker. Turn off the power to that circuit immediately at your electrical panel. Do not touch the drill bit or anything metal near the hole. You will need to call a qualified electrician to assess the damage and repair the wire. Do not attempt to fix electrical wiring yourself unless you are qualified.
- Water Pipe: If you hit a water pipe, water will start leaking or spraying from the hole. Immediately turn off the main water supply valve to your home. You will need to call a plumber to repair the pipe.
- Other Obstructions: If you hit something else that isn’t a wire or pipe (like metal blocking or ductwork), you may need to move the shelf location or consult a contractor to understand what’s in the wall.
This is why using a stud/hazard finder is so important. Always scan before you drill!
Anchor Doesn’t Hold
If you install an anchor and it feels loose or pulls out easily when you test it or try to attach the bracket:
- Incorrect Drill Bit Size: The pilot hole might be too large for the anchor, preventing it from gripping.
- Incorrect Anchor Type: The anchor might not be suitable for the wall material or the weight.
- Poor Installation: The anchor wasn’t installed correctly (e.g., didn’t expand properly behind the wall).
- Overloading: The intended weight is too much for the chosen anchor.
How to Fix:
- Remove the failed anchor. You might need pliers or a screw to pull it out.
- Assess the hole and the anchor. Was the hole the right size? Did the anchor deploy correctly?
- Patch the damaged hole with drywall joint compound. Let it dry and sand it smooth.
- Choose a different location for the shelf, ideally one where you can hit studs.
- If you must use an anchor in that general area, use a larger, heavier-duty type of anchor, or use multiple anchors. Consider a toggle bolt or snap toggle for strong support in drywall.
- Drill a new pilot hole (or larger hole for toggle bolts) a couple of inches away from the damaged spot, ensuring it’s still level and clear of hazards. Install the new, stronger anchor correctly.
Safety First: Essential Precautions
DIY projects are rewarding, but safety should always be your top priority. Taking a few simple precautions can prevent accidents and injuries.
- Always Wear Safety Glasses: Drilling creates dust and small particles that can fly into your eyes. Protect your vision by wearing safety glasses from the moment you pick up the drill.
- Check for Electrical Wires and Pipes: We’ve mentioned this multiple times because it’s that important. Use a stud finder or detector to scan the wall thoroughly before drilling any holes. Know the location of outlets, switches, and plumbing fixtures, as these are indicators of potential hazards within the wall.
- Use the Right Tools and Fasteners: Ensure your drill is appropriate for the wall material (use a hammer drill for masonry). Use sharp drill bits of the correct size. Select wall anchors and screws that are specifically designed for your wall type and are rated to support the weight of the shelf and its contents. Using undersized or incorrect fasteners is a recipe for failure.
- Don’t Overload the Shelf: Every shelf and mounting system has a weight limit. Be mindful of how much weight you place on the finished shelf. Distribute items evenly and avoid putting excessively heavy objects in one spot. If you’re unsure, err on the side of caution.
- Get Help for Large or Heavy Shelves: Trying to maneuver a large, heavy shelf board and align it with brackets or hidden hardware by yourself can be difficult and dangerous. You could drop the shelf, damage the wall, or injure yourself. Don’t hesitate to ask a friend or family member for an extra set of hands, especially during the mounting phase.
- Keep Your Workspace Clean: Clear the area below where you’re working to avoid tripping hazards. Have a trash bag or container ready to collect dust and debris as you work.
Taking these safety steps adds minimal time to the project but provides crucial protection.
Finishing Touches and Loading Your Shelf
Once the shelf is securely mounted, a few final steps complete the project.
Finishing Touches
- Clean Up: Wipe away any pencil marks from the wall. Vacuum or sweep up dust and debris from drilling.
- Cover Screw Heads: If your shelf hardware includes decorative caps to cover screw heads, snap or place them into position for a cleaner look.
- Touch-Up Paint: If any paint was scuffed or damaged during installation, a small amount of touch-up paint can make the installation points disappear.
Loading Your Shelf
Before you load up your new shelf with all your items, take a moment to consider weight distribution.
- Distribute Weight Evenly: Avoid placing all the heaviest items on one end or in the center if the shelf is long. Spread the weight out across the length of the shelf, ideally positioning heavier items directly over the brackets or mounting points.
- Understand the Weight Limit: Reiterate the importance of the shelf’s and the mounting hardware’s weight capacity. Do not exceed this limit. If you find yourself needing to put more weight on the shelf than it’s rated for, you might need to install additional support or consider a different shelving solution.
- Place Items Carefully: Gently place items on the shelf rather than dropping them.
With the shelf securely installed and properly loaded, you can now enjoy your new display and storage space!
Conclusion
Adding a big wall shelf doesn’t have to be an all-day project. With the right preparation, tools, and a clear understanding of your wall type and fastening options, you absolutely can install a substantial shelf quickly and securely.
We’ve walked through selecting the best shelf and location, gathering your essential tools and materials, understanding the different wall types, and mastering the techniques for finding studs or using heavy-duty wall anchors when studs aren’t available. We covered the step-by-step process for both bracketed and floating shelves, along with crucial safety precautions and troubleshooting tips.
By taking a little time to plan and prepare, you make the actual installation much faster and smoother. Getting everything ready beforehand and knowing exactly where and how you’ll attach the shelf are the real secrets to hitting that under-30-minute goal.
Now, stop staring at that empty wall and start imagining the possibilities! You have the knowledge to tackle this project and add valuable storage and style to your home. Grab your tools, follow these steps, and enjoy the satisfaction of a job done quickly and correctly. Your space will feel instantly more organized and inviting.