Fun & Functional Box Shelves for Wall: Design Ideas for Any Room
Discover how box shelves can add both style and storage to your home. Explore creative design ideas and essential installation tips…
This post may contain affiliate links. If you make a purchase through these links, we may earn a commission at no additional cost to you.
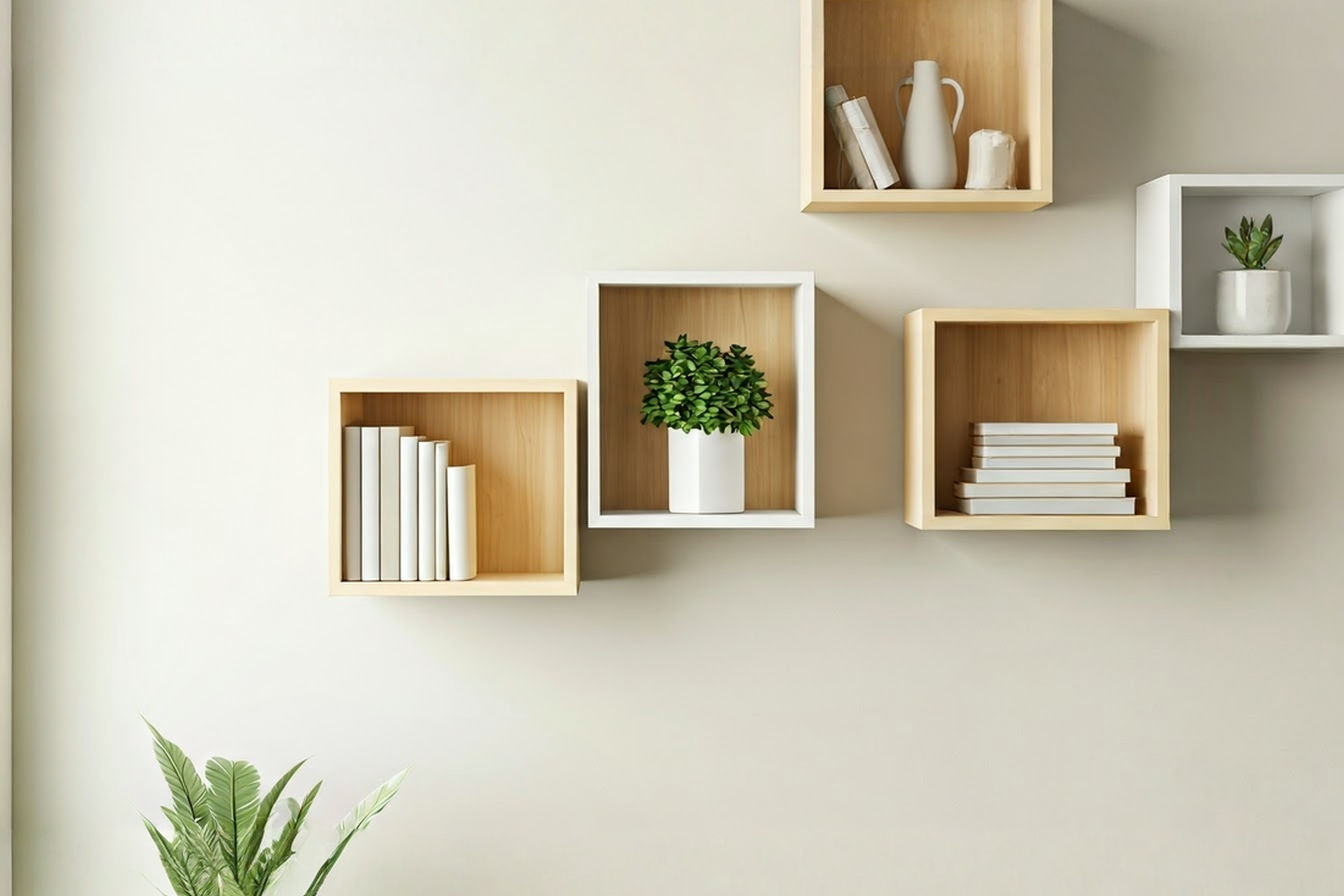
Box shelves, often called cube shelves or wall cubes, are more than just simple storage. These versatile pieces of furniture offer a fantastic way to add both personality and practicality to any wall in your home. Unlike traditional bulky shelving units that sit on the floor, box shelves are mounted directly to the wall, freeing up valuable floor space and creating a clean, modern look. They can be used individually to highlight a single item or grouped together in creative arrangements to form a unique display or storage system. Whether you’re looking to declutter, showcase your favorite things, or simply add some visual interest to a blank wall, box shelves provide a flexible and stylish solution. This guide will explore everything you need to know about incorporating fun and functional box shelves into your home decor, from choosing the right type and material to installation tips and creative design ideas for every room.
Why Choose Box Shelves? Style, Function, and Versatility
The popularity of box shelves isn’t just a trend; it’s due to their incredible adaptability and numerous benefits. They offer a unique blend of form and function that traditional shelving often can’t match.
One of the biggest advantages is their aesthetic appeal. Box shelves have clean lines and a minimalist design that fits seamlessly with many decor styles, from modern and contemporary to rustic and eclectic. When installed, they often have a “floating” appearance, which adds a sense of lightness and sophistication to a room. You can find them in various finishes and colors, making it easy to match your existing decor or add a pop of contrasting color.
Beyond looks, box shelves are incredibly functional. They provide open storage, making items easily accessible. This is perfect for things you use often or want to have on display, like books, decorative objects, plants, or even everyday essentials. Unlike cabinets with doors, everything on a box shelf is visible, which can encourage you to keep things tidy and organized.
Their versatility is also a major draw. Box shelves aren’t limited to a single purpose or room. They can serve as bedside tables in a small bedroom, extra pantry storage in a kitchen, a landing spot for keys and mail in an entryway, or a dynamic display for toys and books in a child’s room. Their modular nature means you can start with just one or two and add more later as your needs change or your collection grows. You can arrange them in symmetrical grids for a classic look or create asymmetrical, artistic patterns that reflect your personal style. This flexibility in arrangement allows you to customize your storage and display solutions precisely to your space and taste.
Types of Box Shelves: Shapes, Configurations, and Materials
Box shelves come in a surprising variety, offering options to suit almost any need and design preference. Understanding the different types is the first step in choosing the right ones for your project.
Single Box Shelves
The most basic type is the single box shelf. This is simply a standalone cube or rectangle designed to be mounted individually. These are great for small spaces, creating focal points, or filling awkward wall areas. You can use a single box shelf to display a cherished collectible, hold a small plant, or keep essentials like keys or a phone by the door. Their simplicity makes them incredibly versatile.
Multi-Compartment Units
Taking the single box concept further, multi-compartment units combine several boxes into one connected piece. These can range from simple double or triple box configurations to larger units with many compartments arranged in a grid or staggered pattern. These units offer more substantial storage and display space and create a stronger visual statement on the wall. They are ideal for organizing larger collections of books, decor items, or even clothing and accessories in a closet or dressing area.
Geometric Shapes
For a more playful or modern look, box shelves are available in geometric shapes other than squares or rectangles. Hexagons are particularly popular, allowing you to create a honeycomb-like pattern on your wall by grouping multiple shelves together. Other shapes like triangles or even irregular, interlocking designs can add a unique artistic touch to a room. These shapes are often used primarily for decorative purposes, showcasing a few select items, but they still provide functional display space.
Corner Box Shelves
Utilizing often-underused space, corner box shelves are specifically designed to fit snugly into the corner of a room. These can be single triangular shelves or multi-tiered units that wrap around the corner. They are excellent for maximizing storage in tight spaces like small bathrooms, kitchens, or entryways. Corner shelves provide a practical solution for displaying items or storing necessities without taking up valuable wall space needed for larger furniture or artwork.
Materials Matter: Understanding Your Options
The material of a box shelf affects its appearance, durability, weight capacity, and cost. Common materials include various types of wood, wood composites, and metal.
Solid Wood: Shelves made from solid wood (like pine, oak, or maple) are generally the most durable and can support the most weight. They offer a classic, natural look and can be stained or painted to match any decor. However, solid wood shelves are typically the most expensive option. The grain and natural variations in solid wood add warmth and character to the shelves. Different wood types have varying densities and strengths, impacting their load-bearing capacity. For example, oak is denser and stronger than pine.
MDF (Medium-Density Fiberboard): MDF is an engineered wood product made from wood fibers, resin, and wax. It has a smooth surface that’s excellent for painting or applying laminate. MDF is denser and more stable than particleboard, making it a good choice for shelves. It’s generally more affordable than solid wood but less durable and susceptible to damage from moisture. MDF is often used for painted or lacquered box shelves.
Particleboard: This is another engineered wood product, made from wood particles glued together. Particleboard is the least expensive option but also the least durable and has the lowest weight capacity. It’s often covered with a laminate or veneer to improve its appearance and protect it from minor damage. Particleboard is commonly used in budget-friendly furniture and shelves. While affordable, it’s important to be mindful of its limitations regarding weight and moisture resistance.
Laminate: Laminate isn’t a core material itself but a finish applied to wood composites like MDF or particleboard. It’s a thin layer of material (often plastic) that mimics the look of wood grain, solid colors, or other patterns. Laminate is durable, easy to clean, and resistant to scratches and moisture. However, if the laminate layer is damaged, the underlying particleboard or MDF can be exposed and vulnerable.
Metal: Metal box shelves, often made from steel or aluminum, offer a sleek, industrial, or modern look. They are very durable and can typically support significant weight, depending on the gauge of the metal and the construction. Metal shelves can be powder-coated in various colors for added durability and aesthetics. While sturdy, metal shelves might not fit every decor style and can sometimes be heavier than wood options.
Choosing the right material involves balancing factors like budget, desired aesthetic, required weight capacity, and the environment where the shelf will be placed (e.g., a humid bathroom might require a more moisture-resistant material).
Designing with Box Shelves: Ideas for Every Room
The beauty of box shelves lies in their adaptability. They can be seamlessly integrated into almost any room, providing both practical storage and opportunities for creative display. Here are some ideas for using box shelves throughout your home:
Living Room
In the living room, box shelves can serve multiple purposes. They can act as a modern alternative to traditional bookcases, displaying your literary collection alongside decorative objects, photos, and small plants. Arranging multiple boxes in an interesting pattern above a sofa or media console creates a dynamic focal point. Use them to house media components like a streaming box or gaming console, keeping them off other surfaces. Varying the size and depth of the boxes can add visual interest to the arrangement. Consider using a mix of open boxes and those with doors or drawers for hidden storage of remotes or coasters.
Bedroom
Box shelves can be incredibly useful in the bedroom, especially in smaller spaces. A single box shelf mounted next to the bed can function as a minimalist nightstand, holding a book, phone, or a small lamp. A series of boxes can create a unique headboard alternative, providing display space for personal items, artwork, or small plants. Use them on a dressing table area to organize cosmetics, perfumes, or jewelry. They can also add vertical storage in a closet for folded clothes, shoes, or accessories.
Kitchen
Open shelving is a popular trend in kitchens, and box shelves are a perfect fit. They can be used to display attractive dishware, glassware, or cookware, adding a decorative element while keeping frequently used items accessible. Install them to hold spices, oils, or other cooking essentials near the stove or prep area. A small box shelf can be a designated spot for cookbooks or a tablet used for recipes. Consider the weight capacity needed for heavier items like stacks of plates. Moisture and grease are considerations in a kitchen, so choose materials and finishes that are easy to clean and resistant to these elements.
Bathroom
In the bathroom, where space is often limited, box shelves provide essential vertical storage. Use them to hold towels, toiletries, soaps, or decorative items like candles or small plants. Ensure the shelves are made from moisture-resistant materials like treated wood, laminate, or metal to withstand the humid environment. Mounting box shelves above the toilet or next to the mirror maximizes often-unused wall space. Grouping a few small boxes can create a visually appealing and functional storage solution for everyday bathroom necessities.
Home Office
A well-organized home office is key to productivity, and box shelves can help keep things tidy. Use them to store books, binders, files, or office supplies. They can also display motivational items, photos, or plants to personalize your workspace. Arranging shelves in a grid or staggered pattern can create a professional yet stylish backdrop for video calls. Consider incorporating boxes with dividers to keep smaller items like pens, paper clips, and sticky notes organized.
Kids’ Rooms
Box shelves are fantastic in kids’ rooms for both storage and display. They provide accessible spots for toys, books, stuffed animals, and art supplies. Use them to showcase collectibles, trophies, or artwork. Arranging colorful boxes at different heights can create a fun and engaging wall display. Ensure shelves are securely mounted and consider placing heavier items on lower shelves for safety. They can also be used to organize clothes or accessories in a closet or play area.
Hallways and Entryways
Hallways and entryways are often high-traffic areas where clutter can accumulate. Box shelves offer a simple solution for keeping these spaces organized and welcoming. A small box shelf can be a designated spot for keys, mail, or a wallet. A series of shelves can display small decorative items, plants, or framed photos, adding personality to the space. Consider a shelf with hooks underneath for hanging coats or bags. They provide a convenient landing spot for items you need to grab on your way out the door.
Choosing the Right Box Shelves: Factors to Consider
Selecting the perfect box shelves involves more than just picking a style you like. Several practical factors should influence your decision to ensure they meet your needs and are safely installed.
Size and Scale: Consider the size of the wall and the room where the shelves will be installed. Large, deep boxes might overwhelm a small wall, while tiny shelves could look lost on a large expanse. Think about what you plan to put on the shelves and ensure the dimensions are appropriate. Measure the height, width, and depth of the items you want to display or store. The shelves should be deep enough to comfortably hold items without them hanging over the edge, but not so deep that they protrude too far into the room and become a hazard.
Weight Capacity: This is a critical factor, especially if you plan to store heavier items like books or ceramics. The weight capacity of a shelf depends on its material, construction, size, and, most importantly, how it’s mounted to the wall. Manufacturers usually provide a weight limit, but this is often based on ideal installation conditions (e.g., mounted directly into wall studs). Understand that the actual weight capacity in your home might be lower depending on your wall type and the type of wall anchors used. Always err on the side of caution and choose shelves and mounting hardware rated for more weight than you anticipate placing on them. Overloading shelves can lead to sagging, damage to the shelf, or even failure and damage to the wall.
Style and Finish: Box shelves come in a wide range of styles, from sleek and modern to rustic and distressed. Consider the overall aesthetic of the room and choose shelves that complement it. The finish (paint, stain, laminate) also plays a significant role in the look and durability. A high-gloss finish can look modern and is easy to clean, while a matte finish might offer a more subtle look. Wood stains can range from light and natural to dark and rich, affecting the warmth and formality of the shelves.
Budget: Box shelves are available at various price points, from inexpensive particleboard options to more costly solid wood or metal designs. Determine your budget beforehand and look for shelves that offer the best combination of quality, style, and weight capacity within that range. Remember that investing a bit more in higher-quality materials and construction can result in more durable shelves that last longer and can support more weight.
Quantity and Arrangement: Think about how many shelves you need and how you plan to arrange them. Will you use a single shelf, a pre-configured multi-unit, or multiple individual boxes arranged in a custom pattern? Planning the layout beforehand helps you determine the total number of shelves required and visualize how they will look on the wall. You can sketch out different arrangements on paper or use online design tools to help you decide.
Installation Tips and Considerations
Proper installation is crucial for the safety and stability of your box shelves. A securely mounted shelf can hold the intended weight and remain firmly in place for years. Improper installation can lead to sagging, damage to the wall, or even the shelf falling down.
Understanding Wall Types
The type of wall you have will dictate the appropriate mounting hardware.
Drywall (Gypsum Board): This is the most common interior wall material in many homes. Drywall itself is relatively soft and cannot support much weight on its own. To hang anything heavier than a very light picture, you’ll need to use wall anchors or screw directly into the wall studs. Wall studs are the vertical wooden or metal framing members behind the drywall. Using a stud finder to locate these is the most secure method for mounting shelves that will hold significant weight.
Plaster Walls: Older homes often have plaster walls, which are made of layers of plaster applied over wooden lath strips. Plaster is generally harder and more brittle than drywall. While it can support slightly more weight than drywall alone, it’s still best to use appropriate anchors or find studs when hanging shelves. Drilling into plaster can be tricky, as it can crack or crumble. Using a masonry bit and drilling slowly can help.
Masonry Walls (Brick, Concrete, Block): These are solid, sturdy walls that can support substantial weight. However, you’ll need specialized masonry drill bits and anchors designed for these materials. Standard screws or drywall anchors will not work. Masonry anchors expand within the drilled hole to create a secure grip in the solid material.
Types of Wall Anchors: The Technical Details
When you can’t screw directly into a wall stud, wall anchors are essential for providing a secure point in the wall material. Different anchor types are designed for different wall materials and weight capacities.
Plastic Expansion Anchors: These are simple plastic sleeves inserted into a pre-drilled hole. As you drive a screw into the anchor, the plastic expands, gripping the sides of the hole. They are suitable for lightweight items in drywall or plaster. Simplified Explanation: These are basic plastic plugs that spread out when you put a screw in them, giving a little grip in the wall. Technical Detail: Typically made of nylon or polyethylene, they rely on friction and mechanical expansion within the substrate. Their holding power is limited, usually to a few pounds per anchor in drywall.
Self-Drilling (Threaded) Anchors: These anchors, often made of plastic or metal, have sharp threads that allow you to screw them directly into drywall without pre-drilling (though pre-drilling is sometimes recommended for metal versions or harder drywall). A screw is then driven into the anchor. They provide a more secure hold than basic plastic anchors and are suitable for medium-weight items. Simplified Explanation: These anchors screw right into the drywall like a big screw themselves, then you put your regular screw into them. Technical Detail: They create their own threads in the drywall. Metal versions generally offer higher pull-out strength than plastic ones. Weight capacity varies but is typically in the range of 20-50 pounds per anchor in drywall, depending on the design and material.
Hollow Wall Anchors (Molly Bolts): These metal anchors are inserted into a pre-drilled hole in hollow walls (drywall or plaster). As you tighten the screw, the body of the anchor expands behind the wall, creating “legs” that grip the back surface of the drywall or lath. They are suitable for medium to heavy-medium loads. Simplified Explanation: These metal anchors open up like wings behind the wall when you tighten them, grabbing onto the back of the drywall. Technical Detail: They form a positive mechanical connection by clamping onto the back surface of the hollow wall material. Weight capacities can range from 25-75 pounds per anchor, depending on size and wall thickness.
Toggle Bolts (Wing-Style Anchors): Considered one of the strongest anchors for hollow walls, toggle bolts consist of a long machine bolt and a spring-loaded wing that folds closed to pass through a drilled hole and then springs open behind the wall. As you tighten the bolt, the wing pulls flush against the back of the wall. They are ideal for heavy loads in drywall or plaster. Simplified Explanation: These have a metal piece that flips open behind the wall and pulls tight, creating a very strong hold. Technical Detail: The large surface area of the toggle wing distributes the load over a wider area of the wall, significantly increasing pull-out strength. Weight capacities can be 50-100+ pounds per anchor, depending on size and wall condition.
Expansion Anchors (for Masonry): These anchors, often made of metal, are designed for solid masonry walls. They are inserted into a pre-drilled hole, and as a bolt or screw is tightened, a part of the anchor expands, wedging itself firmly against the sides of the masonry. They are suitable for heavy loads in brick, concrete, or block. Simplified Explanation: These metal anchors wedge themselves tightly into solid brick or concrete walls. Technical Detail: They create a secure hold through friction and mechanical interlock within the solid masonry substrate. Types include sleeve anchors, wedge anchors, and lag shields, with weight capacities varying based on size and type, often supporting hundreds or even thousands of pounds in concrete.
Always choose the appropriate anchor for your wall type and the weight you plan to put on the shelf. Using the wrong anchor is a common cause of shelf failure.
Measuring and Leveling
Accurate measuring and leveling are essential for a professional-looking installation. Use a tape measure to determine the desired position of your shelves. Mark the mounting points on the wall lightly with a pencil. Use a level to ensure your marks are perfectly horizontal or vertical, depending on your desired orientation. Even a slight tilt will be noticeable once items are placed on the shelf. For multiple shelves, measure the distance between them carefully to ensure consistent spacing.
Step-by-Step Installation Guide (Simplified)
While specific steps vary slightly depending on the shelf design and mounting hardware, here’s a general simplified process:
- Plan and Mark: Decide on the shelf placement and mark the mounting points on the wall using a level.
- Drill Holes: Drill pilot holes at the marked points. The size of the drill bit depends on the type of anchor or screw you’re using. Refer to the anchor packaging for the correct size.
- Insert Anchors (if needed): If not screwing into a stud, insert the appropriate wall anchors into the drilled holes following the manufacturer’s instructions. Ensure they are flush with the wall surface.
- Attach Mounting Hardware: Attach the shelf’s mounting bracket or hardware to the wall using screws driven into the studs or anchors. Use your level again to double-check that the hardware is straight before fully tightening the screws.
- Mount the Shelf: Attach the box shelf to the installed mounting hardware. This might involve sliding the shelf onto a bracket, screwing it onto the hardware from the side or bottom, or using a cleat system.
- Secure the Shelf: Depending on the design, there might be small set screws or other fasteners to secure the shelf firmly to the mounting hardware. Tighten these to prevent the shelf from shifting.
- Test the Shelf: Gently apply some pressure to the shelf to ensure it feels secure before placing items on it. Start by placing lighter items and gradually add weight up to the intended load, checking for any signs of instability.
Remember to always follow the specific installation instructions provided with your box shelves and mounting hardware. Safety is paramount during installation. Wear safety glasses when drilling and use the correct tools for the job.
DIY Box Shelves: A Basic Guide
For those who enjoy woodworking or want a custom size or look, building your own box shelves is a rewarding project. It allows for complete control over dimensions, materials, and finish.
Materials: You’ll need lumber (pine is a good, affordable choice for beginners), wood glue, screws or nails, sandpaper, and your chosen finish (paint or stain). Plywood or MDF can also be used, especially if you plan to paint the shelves.
Tools: Basic woodworking tools are required, including a saw (circular saw or miter saw), a drill, a measuring tape, a level, clamps, and safety glasses.
Basic Construction Steps:
- Cut the Pieces: Measure and cut your lumber to the desired lengths for the top, bottom, and sides of your box. Ensure all cuts are square (at a 90-degree angle) for clean joints.
- Assemble the Box: Apply wood glue to the edges of the pieces that will join together. Assemble the box shape, using clamps to hold the pieces in place while the glue dries. For added strength, drill pilot holes and drive screws or use nails to reinforce the joints.
- Sand: Once the glue is dry, sand the entire box smooth. Start with a coarser grit sandpaper (like 80 or 100) to shape and remove imperfections, then move to finer grits (150 or 220) for a smooth finish.
- Finish: Apply your chosen paint or stain according to the product instructions. You may need multiple coats. If painting MDF, use a primer first to seal the edges.
- Add Mounting Hardware: Depending on how you plan to hang the shelf, attach the appropriate mounting hardware to the back of the box. This could be a French cleat system, keyhole hangers, or a simple ledger board inside the box.
Building DIY shelves allows you to create unique shapes and sizes not available commercially. You can add dividers, back panels, or even doors to customize the functionality.
Styling Your Box Shelves: Arranging Items with Flair
Once your box shelves are installed, the fun part begins: styling them! Arranging items on your shelves is an opportunity to showcase your personality and creativity. Think of each box as a small stage or a curated vignette.
Balance and Visual Weight: Avoid overcrowding the shelves. Leave some empty space to allow the displayed items to breathe and stand out. Distribute items with varying visual weight across the shelves to create balance. Don’t put all the large or heavy-looking items on one shelf.
Vary Heights and Textures: Use items of different heights and textures to create visual interest. Combine tall objects like vases or books with shorter items like candles or small sculptures. Mix smooth textures with rough or patterned ones.
Group Items: Arrange items in small groups, typically in odd numbers (threes or fives), which often looks more visually appealing than even numbers. Group similar items together or mix different types of objects that share a common theme or color palette.
Layering: Create depth by layering items. Place larger items at the back and smaller items in front. Lean framed photos or small pieces of art against the back of the shelf and place objects in front of them.
Color Palette: Consider the color scheme of your room and the items you’re displaying. You can choose to stick to a monochromatic palette for a cohesive look, or introduce pops of contrasting color to make the shelves stand out.
Themes: Style your shelves around a theme, such as travel (souvenirs, maps), nature (plants, stones), or a specific color. This can help guide your selection of items and create a cohesive display.
Personal Touches: Include personal items like family photos, heirlooms, or items collected from your travels. These make the shelves feel unique and tell a story about you.
Plants: Small potted plants add life and color to box shelves. Choose plants that are suitable for the light conditions of the room and don’t require excessive watering that could damage the shelf material.
Remember that styling is subjective, and there’s no single “right” way to do it. Experiment with different arrangements until you find something that you love and that reflects your style. You can always rearrange items as your mood or the season changes.
Maintenance and Care
Keeping your box shelves looking their best requires minimal maintenance. The specific care needed will depend on the material the shelves are made from.
For most materials like wood, laminate, and metal, regular dusting with a soft cloth is usually sufficient. For spills or sticky marks, wipe the shelves with a damp cloth and a mild all-purpose cleaner. Avoid using abrasive cleaners or harsh chemicals, which can damage the finish.
If you have solid wood shelves, you may need to periodically reapply a wood polish or wax to keep the wood protected and looking its best. Follow the recommendations for the specific type of wood and finish.
For shelves in humid environments like bathrooms or kitchens, pay extra attention to wiping up moisture promptly to prevent damage, especially if the shelves are made from wood composites like MDF or particleboard.
Periodically check the mounting hardware to ensure it’s still secure. If you notice any wobbling or signs of the shelf pulling away from the wall, address the issue immediately by tightening screws or reinforcing the anchors.
Troubleshooting Common Issues
Even with careful installation, you might encounter a few issues with box shelves. Knowing how to troubleshoot them can save you time and prevent damage.
Shelf is Sagging: This is usually caused by overloading the shelf or using inadequate mounting hardware for the weight or wall type. Simplified Explanation: If your shelf is bending, it’s either got too much stuff on it or isn’t held up strongly enough. Technical Detail: Sagging indicates that the load applied exceeds the shelf’s structural capacity or the pull-out strength of the wall anchors. To fix this, first, remove the items from the shelf. Assess the weight capacity of your shelves and mounting hardware. If the hardware is insufficient, you’ll need to replace it with stronger anchors (like toggle bolts for drywall) or add more mounting points, preferably into wall studs if possible. If the shelf material itself is sagging, it might be overloaded, or the material might not be strong enough for the intended use. Consider replacing the shelf with one made from a more robust material or reducing the weight placed on it.
Shelf is Loose or Wobbling: This indicates that the mounting hardware is not securely fastened to the wall. Simplified Explanation: If the shelf feels shaky, the screws or anchors holding it to the wall aren’t tight enough. Technical Detail: Looseness can result from screws backing out, anchors failing to grip the wall material securely, or improper installation of the mounting bracket. To fix this, carefully remove the items from the shelf. Check the screws and tighten any that are loose. If the anchors feel loose in the wall, they might be damaged or the wrong type for your wall. You may need to remove the old anchors, repair the wall if necessary, and install new, appropriate anchors. Ensure the mounting bracket is installed correctly and flush against the wall.
Damage to the Wall Around the Shelf: This can happen if the shelf is overloaded, pulled on, or if the wrong type of anchor was used, causing the wall material to crumble or tear. Simplified Explanation: If the wall around the shelf is damaged, it means the shelf put too much stress on that spot. Technical Detail: Wall damage, such as crumbling drywall or enlarged anchor holes, occurs when the forces exerted by the shelf’s load exceed the shear or pull-out strength of the wall material or the anchor’s grip. To address this, remove the shelf and all mounting hardware. You’ll need to repair the damaged section of the wall using drywall joint compound or plaster repair materials. Once the repair is dry and sanded smooth, you can remount the shelf, but use a different location if the damage is extensive, or use stronger anchors that distribute the load over a wider area.
Addressing these issues promptly is important to prevent further damage to your wall and shelves.
Conclusion
Box shelves offer a fantastic combination of fun design potential and practical functionality for any home. Their versatility allows them to be used in virtually any room, providing valuable storage and display space while adding a touch of modern style. From single floating cubes to multi-compartment geometric arrangements, the options are vast, allowing you to customize your walls to suit your specific needs and aesthetic preferences.
Choosing the right material, understanding the importance of proper installation techniques, and selecting the correct wall anchors for your specific wall type are crucial steps to ensure your shelves are safe and secure. Whether you opt for ready-made shelves or decide to build your own, the process of adding box shelves to your walls is a rewarding way to enhance your living space.
Once installed, styling your box shelves is an opportunity to let your personality shine. By thoughtfully arranging items, you can create dynamic and visually appealing displays that reflect your interests and complement your decor. With a little planning and attention to detail, box shelves can transform blank walls into functional and beautiful features in your home. So, go ahead and explore the possibilities – your walls are a blank canvas waiting to be adorned with the creative potential of box shelves!